RSS Feed

Tag Archives: Breakfast

Sweet Potato Patties – kids love them!

Sweet Potato Patties on PlatterWe have all seen that version of frozen “sweet potato patties”  or “yam patties” that you can get in the store.  I think they were even served regularly in our school cafeteria when I was a kid.  I am talking about these:

FrozenSweetPotatoYamPatties

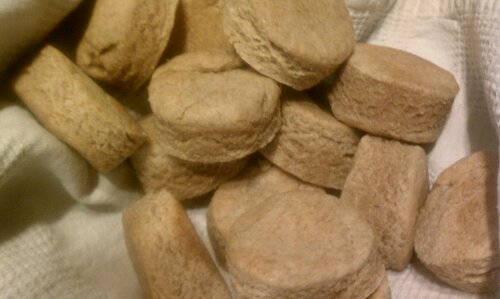
Highly-Processed Frozen Sweet Potato Yam Patties

According to the website, the ingredients for those are: Yams (Sweet Potatoes), Sugar, Cornstarch, Buttermilk, Salt, Yellow 6, Red 40, Natural And Artificial Flavoring, Disodium Dihydrogen Pyrophosphate (To Retain Natural Color).

So while they do start out as a vegetable (a sweet potato, as a real “yam” is a totally different veggie), the manufacturer has added lots of sugar, artificial flavorings and two types of food dyes.  Yuck!  So, why not just make your own?

We had the day off school last week for a Teacher’s Professional Day.  We got to wake up late and I wanted to make the girls a filling brunch before we headed out to the Chickasaw Cultural Center.  If you live anywhere nearby, I highly recommend a visit.

I had only one sweet potato and it needed to be used. Since Sarah, especially, loves roasted sweet potatoes, I decided to shred it and make a hybrid between hash browns and a pancake.  I used a combo of mashed banana and honey to give it a bit of sweetness.  Since I put honey inside it, I did not serve any honey or syrup at the table.

I shredded the potato on my hand grater, but if you are doing more than one potato, using the shredding blade on your food processor would be great.  Or, if you wanted that totally puréed potato texture that the frozen ones have, then just throw everything in your food processor and purée it before cooking.  I add the flax-seed to boost the Omega-3′s and also to thicken the mixture without having to rely on any kind of flour.  I guess it also makes this gluten-free, if that matters to your family.

By the way, “pumpkin pie spice” is a mixture of ground cinnamon, ginger, nutmeg, and either allspice or cloves.  If you do not have the ready-made spice mix, then you can mix together 1.5 tsp cinnamon + 3/4 tsp ginger + 1/4 tsp nutmeg + 1/4 tsp cloves/allspice,  all ground, to make your own. The girls all ended up LOVING them and surprisingly, it was Emma not Sarah who loved them the most, as she ate FOUR of them.

Sweet Potato Patties - IngredientsSweet Potato Patties
Makes about 12 patties

  • 1 good-sized sweet potato, peeled and shredded
  • 1 ripe banana, mashed
  • 1 large organic egg
  • 1 tablespoon real maple syrup or honey
  • 1/8 teaspoon pumpkin pie spiceSweet Potato Patties - Preparation
  • 2 tablespoon ground flax seed (optional)
  1. Mix all ingredients together in bowl.
  2. Lightly grease a frying pan, skillet or griddle  and place over medium high heat.  I used coconut oil to grease mine.
  3. When pan is hot, put scoops of the mixture in pan and flatten slighty with the back of your spoon.
  4. Cook until patties are brown on both sides.  Serve.

We enjoyed ours with a piece of nitrate-free bacon, an organic fried egg, grape tomatoes, apple slices and steamed french green beans.

Day off of School Brunch

The nutritional info from About.com’s recipe analyzer, for one patty: Sweet Potato Patties - Nutrition

Look at all that Vitamin A!  And the grams of sugars in my patties are much less than the storebought frozen ones, even with the little bit of honey in them.

Breakfast Casserole, without the bread

Breakfast Casserole

Everyone loves the taste of those breakfast casserole recipes that start with soaking multiple slices of white bread in eggs and milk overnight.  You know the ones that people serve for holiday breakfasts and brunches.  But, who really needs to eat a bunch of low-nutrition highly-processed white bread?

A friend of mine, Janet, makes something similar, but hers deliciously makes up for the missing bread with a LOT of cheese, kind of like a breakfast crustless quiche.  When I say a lot of cheese, I am serious. So, I adapted and modified her recipe with some others online and came up with this which has I think a reasonable amount of cheese. 

Oh, the sausage I used was from that half of a local pig we bought a few weeks ago. It was a very mild sausage, not spicy at all, so I added a bit of cayenne pepper. Adjust the peppers to your preference based on how spicy your sausage is. There is even a recipe on my blog here for mixing up your own breakfast sausage if you have access to good ground pork…my recipe is for a much spicier pork sausage.

It was a BIG hit with both Mike and the girls this weekend.  Feel free to change out the veggies or better yet, add more, maybe some sautéed spinach?

Breakfast Casserole with Mushrooms & Onions

  • 1 pound bulk sausage
  • 3-4 green onions, chopped
  • 4-6 mushrooms, chopped
  • 8 large eggs
  • 1/4 teaspoon sea salt
  • 1/8 cup half & half or milk
  • 1/8 teaspoon (or more) cayenne pepper
  • 1/8 teaspoon black pepper
  • 2 cup colby jack or mild cheddar cheese, shredded

1. Preheat oven to 350 F and lightly grease an 8×8 baking dish.
2. Brown sausage, remove grease if necessary. Mine didn’t make any.
3. Add onions and mushrooms to sausage until the mushrooms are cooked.
4. Mix together the eggs, salt, peppers, half and half, and cheese in a bowl.
5. Put sausage mixture in baking dish, then pour egg mixture on top and stir to combine.
6. Bake for 30-35 minutes or until eggs are cooked through.

–  Stacey

Note: Sick in bed today, so written and published completely from my phone. 🙂

Another way to make Homemade Yogurt!

Freshly made yogurt in jar

Freshly made yogurt in jar

We eat a lot of plain yogurt and use it in a lot in recipes too.  Sometimes, rarely, I make my own yogurt.  Since we use so much, it is a bit of a mess to make it every other day.   So, we usually just buy Dannon or Stoneyfield or Brown Cow.

I posted a recipe a while back for making yogurt in a Slow Cooker (AKA CrockPot).  Up until then, that was the easiest method I had found.  But, I recently came across one even easier that may inspire me to make my own yogurt more regularly. It is from Daisy at Our Growing Family.

Basically to make yogurt, you have to:

  1. Heat the milk to 180 degrees F to kill any bacteria that may already be lurking in it (probably not any if you open a new container of already pasteurized milk, but we will do it to be extra careful) and to improve the texture of the finished yogurt.
  2. Let the milk cool to the 110-115 degree F range and add your yogurt culture either as a packet of yogurt starter such as “Yogourmet” freeze-dried yogurt starter or by using some already made yogurt, either your own or some store-bought plain yogurt with living cultures in it.
  3. Let the bacteria eating all the milk sugar over time in a warm environment.  Depending on how much lactose (if any) you want left determines the time.  Normally, it is anywhere from 6-12 hours, but some folks who are on special diets restricting sugars go even longer to get rid of almost all the lactose.

My problem is with the third step.  Room temperature here is not warm enough to keep the yogurt in the range for the culture to grow. I have an electric oven, so no warm gas oven with a pilot light to store it in.  In the old days, my grandmother used to put her yogurt to make on top of her hot water heater.  Also, I don’t want to deal with coolers and wrapping things in layers of towels…too much mess and hassle, especially if you have to do it every other day.

With this new method, after you mix yogurt culture into your warm milk, you jar it, put lids on very tight, put back in pot you heated milk in originally, cover with very hot water, put on lid and wait 8 hours. The hot water and the insulation of the pot keep it warm enough. Plus, the pot soaking with water in it gets rid of any milk residue stuck to the bottom.

The only problem was finding jars short enough to sit in my pot with the lid on. Used peanut butter jars worked, but just barely.  Depending on the height of your pot, mason jars may be the best option.
 
Another Homemade Yogurt Method
Based on one from Our Growing Family
 
Ingredients: Whole Milk, small amount of leftover Plain Yogurt
Tools: Large pot with lid, candy thermometer, glass containers with lids that will fit inside your pot with the lid on
 
  1. Use whole milk.  It will give you thick yogurt without having to add gelatin or dried milk powder. 
    Yogurt in jars in pot with hot water

    Yogurt in jars in pot with hot water

    Many folks think that the industrial process for drying milk does bad things to the proteins. 

  2. The way I determined how much milk to use was this:  I found the big pot I wanted to use.  Then I found three glass containers with lids that would all fit in it with the pot’s lid on.  I filled each container up with milk to about 1.5 inches from the top (leaves room for the yogurt culture), and that is my measurement.  Later, you will also  need about 2 Tbsp of plain yogurt for each jar.
  3. Heat milk in your pot (not in the jars) to about 180 degrees F – watch for it to start to bubble or frothe around the edges (but not boiling). Take the milk off the heat and let it cool to about 115 degrees F.  Keep checking on it as you don’t want it too cool too much.
  4. Once the milk has cooled, put about a cup or so of the warm milk in a one of your jars and gently stir in the yogurt or starter. Don’t stir too much if using actual yogurt – just enough to gently incorporate the yogurt. Then, pour that back into the milk and swirl it around.
  5. Pour the milk into jars, place lid on tightly. Place the jars into the pan you used to heat the milk, less dishes to wash that way. It doesn’t matter if you’ve cleaned out the pan or if there is a bit of milk left at the bottom. 
  6. Pour HOT water over the jars, up to the rims. I used almost boiling water from my countertop electric kettle.
  7. Put the lid on the pot and let it sit undisturbed for at least 8 hours or overnight.  If you are nervous about it staying warm enough, you can drape a towel over the pot to help keep the heat in, but I didn’t.
  8. After the wait is over, check your yogurt to see if it’s about the right consistency and thickness. Put it in the fridge for a few hours to stop the process and cool the yogurt.

If you want Greek Yogurt, then as I talked about in my previous post, all you have to do is strain it. Simply put a strainer lined with cheese cloth over a container, pour the yogurt in the strainer, and let sit for a few hours or overnight.  I use a container I can put in the fridge. You can use the liquid that collects in the lower container, the whey in other things such as baking or for soaking oats, other grains, or beans.

We enjoyed our freshly made yogurt for breakfast with homemade granola and a little honey on top.

– Stacey


Green Smoothies

green smoothieHere is a quick post of a recipe that can be a healthy breakfast or snack and incorporates fruits, veggies, and dairy…GREEN Smoothies.  You even get your probiotics with the yogurt.

A green smoothie is made green not by adding some icky food coloring, but by adding some yummy and healthy greens.  You can use spinach, kale, chard, etc.  

We keep raw spinach on hand for salads so that is what we usually put in.  The ratios are up to you, feel free to experiment.  Sometimes I even replace part of the milk with carrot juice.  To make it really rich, you can use coconut milk in place of the milk.

The girls like it and so do I.

Green Smoothie

  • 1 cup fresh fruit (we like bananas)
  • 1 cup frozen fruit (such as peaches, mangos, pineapple)
  • 1 cup raw spinach (packed into measuring cup) or 2 big handfuls
  • 1  cup milk
  • 3/4 cup plain Greek yogurt
  • 1 Tbsp honey (optional)

Place all the ingredients in a blender and puree until smooth.  Serve.

– Stacey

Eggs in a Basket? er…, Eggs in a Nest? um…, Eggs in a Hole?

Girl eating Eggs in a BasketDo your kids like toast and fried eggs?  If so, they will love this even more because it is so cute.  The dish is so simple and is apparently called by lots of different names, egg in a basket, egg in a nest, egg in a hole, hen in a nest, etc.

Also, if you are not that great at frying eggs without messing up the yolk when you flip it, this will make it even easier since the toast acts as an “egg ring”.

No matter what you call it, it is yum.  And the kids do love it.

Note: You will need biscuit or cookie cutter that is smaller than the piece of bread you are using.  While I used a traditional round cutter, if you have a fun shaped one such as a star or heart or animal, give that a try.  🙂

Eggs in a Basket
Serves 4

  • 4 slices of 100% whole wheat bread
  • 4 organic eggs
  • real butter
  • sea salt and freshly ground black pepper, to taste
  1. Use biscuit or cookie cutter to cut one hole in the middle of each of your four pieces of bread.  Save both pieces.
  2. Put a little butter in a frying pan over medium heat and when melted, place all the pieces of bread in pan.Eggs in a Basket cooking
  3. Crack eggs into each of the “holes” in your four pieces of bread.  Sprinkle egg with a little salt and pepper.
  4. When toast is lightly browned on bottom, flip all the pieces of bread.  Don’t forget to flip the cut-out round, too.
  5. Cook until eggs are at your desired doneness… over easy, over hard, etc.
  6. Remove from pan and plate with the cut-out piece of bread as the “top” or “lid” for your basket.  Serve immediately.

Hot breakfast in less than 5 minutes!  My kids like these with egg whites to fully set and the yolk still nicely runny so you have something to dip your “top” in.  Since the dish already includes protein and whole grains, I just like to serve these with some fresh fruit for breakfast.

– Stacey

Eggs in a Basket

Cranberry Orange Pecan Scones

Girl with sconeA scone is just the British (or specifically Scottish) version of a Southern biscuit but with a little sugar and egg and maybe some dried fruit thrown in.  So, being a Southern girl of British heritage, I decided to just adapt my whole wheat biscuit recipe to make scones.

Like biscuits, these are a treat for breakfast or brunch and not an everyday thing because they are mostly flour and butter.  Today is Veteran’s Day and since the girls are out of school, I decided to make them.  But, unlike store-bought breakfast pastries, they are made with real food ingredients.

All the girls loved them.  Emma says “Delicious!” and Leah gives them Two Thumbs Up!

Cranberry Almond Pecan Scones
Serves 8 to 12

  • 2 cups whole wheat pastry flour
  • 1 Tbsp aluminum-free baking powder
  • 1/4 tsp sea salt
  • 1/8 cup ground flax seed (optional)
  • 1/8 cup demerara or raw sugar
  • 1/4 cup real butter
  • 1 egg

    Scone ingredients

    Scone ingredients, forgot to put the butter in the picture

  • 1 banana
  • 1/3 cup (plus a little more if needed) milk
  • 1/3 cup dried cranberries, chopped
  • 1/3 cup pecans, chopped
  • 1/3 cup orange juice
  • 1/4 cup honey
  • 1 Tbsp real butter

Position a rack in the center of the oven and preheat it to 475°F.

Dry scone ingredients in food processorPlace the flour, baking powder, salt, ground flax seed, and sugar into the bowl of your food processor.  Pulse for a second to mix them together.

Cut the butter into small pieces about 1/2 inch or so and add to the food processor bowl.  Pulse until it is the texture of very small peas.  Do not over blend as small lumps of fat are what make the scones flaky.Scones patted out

Add the egg and banana and pulse for a few seconds to mix them in.

Through the downspout of your processor when the lid is on and the processor is running, slowly add the milk.   Mix with as few pulses as possible until all the dough clumps together and pulls away from the sides of the bowl, slowly adding more milk until all the dry ingredients are incorporated into a dough that is no longer crumbly.

Turn the dough out onto a lightly floured work surface and pat or gently roll it flat about 1/2 inch thick.  Knead the cranberries and pecans into the dough.   Fold it in half and pat flat again; this technique helps to build layers that will rise and create the much sought after flakiness. Repeat this twice more, then lightly flour the surface and roll or pat it into a round disk about to 1/2 inch thick.

Baked scones being glazedUsing a sharp floured knife, cut into 8 to 12 wedges with a sharp floured knife.  Place on a greased pan and bake for about 12 minutes.

While baking, place the orange juice, honey and remaining Tbsp of butter in a small pot,  heat and allow to thicken/reduce while scones are baking.

Remove scones from oven and brush on the orange juice glaze.  Serve warm.

– Stacey

Cranberry Orange Pecan Scones

Making Biscuit Cups with my kitchen helper Sarah

Biscuit Cup Meal - Lunch or Breakfast

Biscuit Cup Meal - Lunch or Breakfast

The other day, I saw this recipe for “Quiche Biscuit Cups” at the 5 Dollar Dinners blog.  It looked like a good portable breakfast since it is essentially a biscuit attached to an omelette.  So, i decided to try it.  Sarah was home sick but was feeling surprisingly well by noon, so she got to be my helper.

Since I already have a 100% whole wheat biscuit recipe that I like and it has the same 2 cups flour as her recipe, I decided to make the biscuit base according to mine.  I also didn’t have any green onions, but had lots of shallots, so there was another substitution.

I had one criticism of the recipe and I will be adjusting my version below to reflect the change I will make next time because of it.  I thought there was way too much biscuit and not enough filling.  Instead of being like a quiche where it is a lot of filling with a thin crust, what resulted was more like a biscuit muffin with a thin layer of egg on top.

After a web search were I looked at LOTS of versions of this recipe, apparently, biscuit cups are primarily biscuit with a little filling.  But, I didn’t really care for it that way.  Also, when the biscuit base rose, it pushed some of my egg out of the muffin tin; another reason to cut the amount of biscuit dough.  So, I will be cutting the biscuit part in half and the recipe below reflects that change.  Note that the pictures below show it being made with the full 2 cups of flour.  So, here is my version:

Puffy Omelette Biscuit Cups
Makes 12

Biscuit Base:Sarah with all her ingredients

  • 1 cup whole wheat pastry flour
  • 1.5 tsp aluminum-free baking powder
  • 0.5 tsp sea salt
  • 1/8 cup real butter (this is 2 Tbsp)
  • 3/8 cup buttermilk, or plain whole milk yogurt thinned with milk to buttermilk consistency

Filling:

  • 1 large shallot, finely chopped
  • 6 slices nitrate-free bacon, cooked and crumbled
  • 7-8 eggs (depending on size)
  • 2 Tbsp milk or half & half
  • Sea salt and freshly ground black pepper, to taste
  • 1/2 cup shredded cheese

Position a rack in the center of the oven and preheat  oven to 375°F.  Lightly grease a regular size 12-muffin pan.  Scramble together the eggs, milk, salt, and pepper.

Sift the flour, baking powder, and salt into the bowl of your food processor.  Pulse for a second to mix them together.

Cut the butter into small pieces about 1/2 inch or so and add to the food processor bowl.  Pulse until it is the texture of very small peas  Do not over blend as small lumps of fat are what make the biscuits flaky.

Through the downspout of your processor when the lid is on and the processor is running, slowly add the buttermilk.  You may not need all of it.  Mix with as few pulses as possible until all the dough clumps together and pulls away from the sides of the bowl, slowly adding more buttermilk until all the dry ingredients are incorporated into a dough that is no longer crumbly.

Turn the dough out onto a lightly floured work surface and pat or gently roll it flat about 1/2 inch thick.   Fold it in half and pat flat again; this technique helps to build layers that will rise and create the much sought after flakiness. Repeat this twice more, then lightly flour the surface and roll or pat it out to 1/2 inch thick.

Cut the dough into 12 equal pieces.  Form each piece into a ball with your hands and then pat into a flat disk.  Put one of these disks in each hole in your muffin tin, conforming it to the sides and bottom.

On top of the biscuit base in each hole, put 1/12 of the shallots, bacon, egg mixture, and sprinkle with shredded cheese.

The steps for adding ingredients to your biscuit cups

The steps for adding ingredients to your biscuit cups

Ready for the oven

Ready for the oven

Place the muffin tin in the pre-heated oven and bake for 20-25 minutes. Remove from oven and let cool for about 3 minutes to make it easier to get them out. Remove, plate, and enjoy.

If you want to amp up the nutrition, you can add whatever veggies you like, spinach, peppers, broccoli, etc. You can also freeze these and then microwave them for a fast breakfast.

– Stacey

Yummy Weekend Breakfast – 100% Whole Wheat Biscuits

image

I was trying to direct someone to my whole wheat biscuit recipe on my blog and then realized I had not posted it here yet.  🙂

This recipe is based on one from Damon Lee Fowler, I believe from his “New Southern Kitchen” cookbook, although I will have to check when I get home.  His wasn’t 100% whole wheat or made in a food processor.  If you are interested in Southern cooking from real food ingredients, then I also like his “Classical Southern Cooking” cookbook, but it is sometimes hard to find a copy as it came out in 1995 and is out of print.  Or, you can visit his cooking blog for more Southern recipes.

100% Whole Wheat Southern Breakfast Biscuits
Made in the food processor!

  • 2 cups whole wheat pastry flour
  • 3 tsp aluminum-free baking powder (Rumford is a brand that is; Clabber Girl has aluminum)
  • 1 tsp sea salt
  • 4 Tbsp chilled real butter (it needs to be very cold)
  • 3/4 cup whole milk buttermilk, or plain whole milk yogurt thinned with milk to buttermilk consistency
  1. Position a rack in the center of the oven and preheat it to 500°F.  (Yes, that hot.)
  2. Sift the flour, baking powder, and salt into the bowl of your food processor.  Pulse for a second to mix them together.
  3. Cut the butter into small pieces about 1/2 inch or so and add to the food processor bowl.  Pulse until it is the texture of very small peas  Do not over blend as small lumps of fat are what make the biscuits flaky.
  4. Through the downspout of your processor when the lid is on adn the processor is running, slowly add the buttermilk.  You may not need all of it  — ambient humidity and the moisture content of each bag of flour will vary virtually every time you make bread.  Mix with as few pulses as possible until all the dough clumps together and pulls away from the sides of the bowl, slowly adding more buttermilk until all the dry ingredients are incorporated into a dough that is no longer crumbly.
  5. Turn the dough out onto a lightly floured work surface and pat or gently roll it flat about 1/2 inch thick.   Fold it in half and pat flat again; this technique helps to build layers that will rise and create the much sought after flakiness. Repeat this twice more, then lightly flour the surface and roll or pat it out to 1/2 inch thick.
  6. Using a sharp, round 2-inch biscuit cutter dipped in flour before each cut, cut the dough straight down without twisting the cutter, into 12 biscuits.   When you are cutting at the edges of dough, be sure that there is a cut side all the way around the biscuits or they won’t rise evenly.
  7. You will have scraps of dough left over and you won’t want to waste them;  they can be re-worked if you use extra care. Gather the scraps together, lightly fold the dough over itself, and pat flat about three times – until the scraps just hold together.  Then pat – don’t roll – the dough until it is 1/2 inch thick and cut into additional biscuits.
  8. Put the biscuits on an lightly greased baking sheet and bake until they are risen and golden brown, about 8-10 minutes.  Brush with melted butter if you would like and serve piping hot.


Even using healthier whole wheat flour, they are a big hit of grains, especially since the girls eat several.  They also take longer to make than our weekday oatmeal or scrambled eggs, so we usually only get to enjoy these on weekend mornings.

– Stacey

Apple Dutch Baby – An Eggy Baked Pancake-like Thing

I reached the age of 40 never having heard of a “Dutch Baby”.  The first time I heard about it was watching Melissa D’Arabian make a Vanilla Dutch Baby on her “Ten Dollar Dinners” show.  I tried that recipe and liked it, but then I went looking for a healthier version with less flour, but the whole wheat kind and more eggs for protein. 

I found this recipe at Nourished Kitchen which is one she developed based on the one in the Nourishing Traditions book by Sally Fallon.

So, I hope I gave everyone credit and here is the version I make.  It does take about 45-50 minutes total to prepare, so not a quick breakfast, but I got up a bit early today and since most of the time it is just baking on its own in the oven, I used that time to pack the girls’ lunches.  But usually, this is a Saturday brunch dish for us.

Apple Dutch Baby
Yields 6 to 8 servings

  • 2 Tbsp butter, peanut oil, or coconut oil
  • 3 medium apples, cored and finely diced to about 1/4″ (if organic, leave the skins on)
  • 6 eggs (organic is good and pastured is better)
  • 1/2 cup milk
  • 1/2 cup whole wheat pastry flour (if you use regular whole wheat it will tasted fine, just not puff very much)
  • 1/4 cup unrefined cane sugar, such as Demerara or Sucanat
  • 1/2 tsp ground cinnamon
  • 1/4 tsp ground cloves
  • 1/4 tsp sea salt
  • 1/4 tsp natural lemon extract, optional (or you could use some lemon zest instead)

Preheat oven to 425 degrees F. Melt butter or place oil in a cast iron skillet over a moderate heat, and toss in chopped apples. Gently fry the apples until they are tender.  Meanwhile, put eggs and milk together in your blender container and blend until smooth and fluffy.  To the egg mixture, add flour, sugar, cinnamon, cloves, salt and lemon. Blend again until smooth; it will be very liquidy. Remove the skillet from the heat, pour the batter over the cooked apples and bake in an oven at 425 degrees F for 35 to 40 minutes until puffed and golden. Serve the Dutch Baby cut in wedges immediately.  I somtimes top with a bit of real whipped cream.

Note: You can do this without using an oven-safe skillet such as cast iron, but then you would have to transfer the cooked apples to an oven safe pan before adding the batter.  Using the cast iron skillet saves on clean-up.

The girls all love this dish.  Emma and Leah both had an extra piece.  It is a bit of a treat and the nutrional information is here given here assuming 8 servings.  If you are thinking of serving it with anything sweet such as maple syrup or honey, then do reduce the amount of sugar in the recipe.

– Stacey

Fun Food – Green Eggs – No icky food dye needed

Quick post today.  I was going back through the pictures on my cellphone and found this one:

Green Eggs

Last year in kindergarten for some day related to Dr. Seuss, perhaps his birthday, their teacher made green eggs for all the kids using green food coloring.  The girls were quite taken by this, but we try to avoid food coloring.

Per Marion Nestle:
“Food dyes have only one purpose: to sell junk foods.  Candy, Cheetos, and sodas that are brightly colored are perceived as tasting better than the grey alternatives.  The food industry needs food dyes badly. But nobody else does.  Parents of hyperactive kids can easily do their own experiment and see if removing food colors helps calm their kids down. Food dyes have no health benefits that I can think of.  Kids don’t need to be eating those foods anyway.  Kids will not be harmed by avoiding food dyes. It would be nice to have more conclusive research.  In the meantime, read food labels! .”

Now, if you are using pastured or at least good quality organic eggs, then they will already have yolks that are naturally a bright yellow or orange color, so your scrambled eggs will already have a nice color.  But, if you want to make “green eggs” for your Dr. Seuss fans, here is a way to make them without having to use the dye.

Green Eggs
(serves 4 children or 2 fun adults)

  • 4 organic eggs
  • 1 “handful” of raw spinach
  • salt and pepper, to taste

Crack eggs into your blender. Add raw spinach. Add salt and pepper.  Put on the lid and run blender until the spinach is totally pureed into the eggs.  Scramble eggs however you normally do it.  We used a bit of real butter in ours and do not like them gooey. Enjoy your GREEN EGGS.

You do not taste the spinach in the eggs at all.   As a plus, running the eggs through the blender makes them really fluffy.  For even more “fun”, chop up and add some nitrate-free ham to the eggs as they cook.  Then you can give the kids “Green Eggs and Ham”.

– Stacey