RSS Feed

Monthly Archives: September 2011

Apple Dutch Baby – An Eggy Baked Pancake-like Thing

I reached the age of 40 never having heard of a “Dutch Baby”.  The first time I heard about it was watching Melissa D’Arabian make a Vanilla Dutch Baby on her “Ten Dollar Dinners” show.  I tried that recipe and liked it, but then I went looking for a healthier version with less flour, but the whole wheat kind and more eggs for protein. 

I found this recipe at Nourished Kitchen which is one she developed based on the one in the Nourishing Traditions book by Sally Fallon.

So, I hope I gave everyone credit and here is the version I make.  It does take about 45-50 minutes total to prepare, so not a quick breakfast, but I got up a bit early today and since most of the time it is just baking on its own in the oven, I used that time to pack the girls’ lunches.  But usually, this is a Saturday brunch dish for us.

Apple Dutch Baby
Yields 6 to 8 servings

  • 2 Tbsp butter, peanut oil, or coconut oil
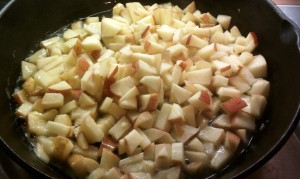
  • 3 medium apples, cored and finely diced to about 1/4″ (if organic, leave the skins on)
  • 6 eggs (organic is good and pastured is better)
  • 1/2 cup milk
  • 1/2 cup whole wheat pastry flour (if you use regular whole wheat it will tasted fine, just not puff very much)
  • 1/4 cup unrefined cane sugar, such as Demerara or Sucanat
  • 1/2 tsp ground cinnamon
  • 1/4 tsp ground cloves
  • 1/4 tsp sea salt
  • 1/4 tsp natural lemon extract, optional (or you could use some lemon zest instead)

Preheat oven to 425 degrees F. Melt butter or place oil in a cast iron skillet over a moderate heat, and toss in chopped apples. Gently fry the apples until they are tender.  Meanwhile, put eggs and milk together in your blender container and blend until smooth and fluffy.  To the egg mixture, add flour, sugar, cinnamon, cloves, salt and lemon. Blend again until smooth; it will be very liquidy. Remove the skillet from the heat, pour the batter over the cooked apples and bake in an oven at 425 degrees F for 35 to 40 minutes until puffed and golden. Serve the Dutch Baby cut in wedges immediately.  I somtimes top with a bit of real whipped cream.

Note: You can do this without using an oven-safe skillet such as cast iron, but then you would have to transfer the cooked apples to an oven safe pan before adding the batter.  Using the cast iron skillet saves on clean-up.

The girls all love this dish.  Emma and Leah both had an extra piece.  It is a bit of a treat and the nutrional information is here given here assuming 8 servings.  If you are thinking of serving it with anything sweet such as maple syrup or honey, then do reduce the amount of sugar in the recipe.

– Stacey

My Favorite Salad Dressings and Veggie Dips

One way to get kids to eat more veggies is to serve them with dressings and dips.  But, look at a bottle of the stuff at the grocery store and it is usually a long list of chemicals.  So, you need easy and fast kid-friendly recipes for dressing and dips and here are a few of mine.  I already posted my ranch dressing recipe, but I am giving it here again for simplicity along with ones for vinaigrette, caesar, and poppyseed.

If you have some vinegar, olive oil, mustard, and honey on hand, you can always whip up the vinaigrette in moments.  If the taste is too intense for your kids, use a less flavorful vinegar than balsamic and up the ratio of oil to vinegar.

The recipes below use storebought mayonnaise.  But, if you do want to make your mayo from scratch, here is a recipe for whole-egg mayo.  Just be sure to buy the highest quality of preferrably local pastured eggs.  You are running a slight risk if you choose to eat raw eggs as you do in homemade mayo.


Ranch Dressing
(based on this one from allrecipes.com)
Yields 1 1/2 cups

  • 1/2 cup mayonnaise
  • 1/2 cup Greek yogurt (or sour cream)
  • 1/2 cup buttermilk
  • 1/2 tsp dried chives
  • 1/2 tsp dried parsley
  • 1/2 tsp dried dill weed
  • 1/2 tsp garlic powder
  • 1/4 tsp onion powder
  • 1/4 tsp sea salt
  • 1/8 tsp freshly ground black pepper

In a large bowl, whisk together all the ingredients. Cover and refrigerate for 30 minutes before serving.  Shake before serving.

Note: If you don’t keep buttermilk around regularly, you can make a substitute by taking 1 cup whole milk and adding 1 Tbsp of while vinegar or lemon juice.  Let the mixture stand for 5 minutes and use as you would buttermilk.


Balsamic Vinaigrette Dressing
Yields about 1/2 cup

  • 1/4 cup balsamic vinegar
  • 1 tsp Dijon mustard
  • 1 Tbsp honey
  • 1/4 cup extra-virgin olive oil or more, if needed
  • sea salt and freshly ground black pepper, to taste

Whisk vinegar, mustard, and honey together.  Slowly whisk in olive oil until it’s incorporated. Season with salt and pepper. Cover and refrigerate for 30 minutes before serving. Shake before serving.


Caesar Dressing
(from Smitten Kitchen)
Yields about 1/2 cup

  • 2 Tbsp mayonnaise
  • 1 Tbsp fresh lemon juice
  • 1/2 tsp Dijon mustard
  • 1 small garlic clove, minced (about 1 tsp of the jarred stuff)
  • 1/2 tsp Worcestershire sauce, plus a little more if you like
  • 1 oil-packed anchovy fillet, finely chopped (optional, I never use this)
  • 1/4 cup extra-virgin olive oil
  • sea salt and freshly ground black pepper, to taste
  • 1/8 cup shredded parmesan cheese (optional, you can just add it to the salad directly)

Whisk all except olive oil and cheese together.  Slowly whisk in olive oil until it’s incorporated.  Season with salt and pepper. Add parmesan cheese. Cover and refrigerate for 30 minutes before serving.  Dressing can be made 1 day ahead.

Note: Since you use prepared mayonnaise for this instead of the traditional raw egg, you don’t have to worry about serving raw egg to kids.  If you are a traditonalist, you can use one raw egg in place of the mayonnaise.


Poppy Seed Dressing
(from “The Lady & Sons Savannah Country Cookbook” by Paula Deen)
Yields 1 1/4 cups

  • 1/3 cup honey
  • 1/4 cup red wine vinegar
  • 1 Tbsp Dijon mustard
  • 1 Tbsp minced onion
  • 1 tsp Paula’s house seasoning (or 2/3 tsp salt, 1/6 tsp black pepper, 1/6 tsp garlic powder)
  • 1 Tbsp poppy seeds
  • 3/4 cup extra-virgin olive oil

Combine all ingredients except oil in a blender.  Process on low, gradually adding oil.  Chill; shake or stir before serving.  Note: Her directions call for a blender, but if you whisk vigorously, you can make it in a bowl as well.

This is great sweet dressing to serve with fruit such as strawberries or on a green salad that features fruit.

– Stacey

More beany treats – Garbanzo Bean Blondies

I hope you all liked the recent Black Bean Brownies post and recipe.  I decided to try making blondies using garbanzo beans, AKA chickpeas. But, you probably could use just about any white bean for this.

I went to lots of sources for white bean blondies recipes and some of the recipes that inspired mine are at Meal Makover Moms, Struggle Muffins, The Blissful Baker, The Runny Egg, Peanut Butter Lover, and Professional Palate.  So, I came up with a recipe I had planned to make using peanut butter, chocolate chips and nuts.

But, I was chatting last night with one of the other soccer moms at the soccer skills camp our girls were attending and she mentioned that she likes to add lemon zest and dried cranberries to her sugar cookies.  I had been thinking of using some dried fruit in the blondies so I went with that flavor combination of lemon and cranberry instead.  This may not be the traditional butterscotchy blondie, but it is good.

When I first thought of making blondies, I had planned to just used chocolate chips and nuts, but when I changed to cranberries, I decided to use the white chocolate chips again and for my nut butter in the recipe, I used almond butter.  So, I am going to give you two recipes…the one I made and the one I planned to make, but didn’t.  I will probably try it in the future.

Garbanzo Bean Blondies – with peanut butter, chocolate chips, and nuts
(makes 16 2″x2″ blondies)

  • 1 can chickpeas AKA garbanzos, drained and rinsed (about 1.5 cups)
  • 1 medium banana
  • 2 large eggs
  • 2 Tbsp honey or maple syrup
  • 1/4 cup granulated sugar
  • 2-4 Tbsp natural creamy peanut butter
  • 1 tsp real vanilla extract
  • 1 tsp aluminum-free baking powder
  • 1/4 tsp baking soda
  • 1/4 tsp cinnamon
  • 1/8 tsp sea salt
  • 1/4 cup ground flax seed or oat flour
  • 1/2 cup semisweet chocolate chips
  • 1/2 cup chopped pecans or walnuts

Garbanzo Bean Blondies – with almond butter, white chocolate chips, and dried cranberries
(makes 16 2″x2″ blondies)

  • 1 can chickpeas AKA garbanzos, drained and rinsed (about 1.5 cups)
  • 1 medium banana
  • 2 large eggs
  • 2 Tbsp honey
  • 1/4 cup granulated sugar (I used Sugar in the Raw)
  • 4 Tbsp natural creamy almond butter
  • 1 tsp real vanilla extract
  • 1 tsp aluminum-free baking powder
  • 1/4 tsp baking soda
  • 1/2 tsp lemon oil (use lemon zest instead, if you have it)
  • 1/8 tsp sea salt
  • 1/4 cup ground flax seed
  • 1/2 cup white chocolate chips
  • 1/2 cup chopped dried cranberries (I used Craisins brand since I had it on had, but it is sweetened)

Directions for both  versions:

Preheat oven to 350 degrees F and grease an 8×8 inch baking pan; I use my MISTO oil sprayer.  Place drained chickpeas in a food processor and blend until smooth.  Add the banana and eggs and process until smooth again.  Add all the rest of the ingredients (except chocolate chips and nuts) to the food processor and process until completely smooth. Stir in chocolate chips and nuts.  Scrape batter into prepared pan and spread evenly.  Bake in preheated oven for 35-40 minutes. Do not overbake.

The girls all liked these Craisin blondies, but I don’t think they are quite as decadent as the previous chocolatey brownies, but it has nothing to do with the beans, just the lack of lots of chocolate.  🙂  I used 1/2 cup of Craisins, but that may have actually been too much, the cranberry taste was a little stronger than I would have like, so will probably reduce the cranberries to 1/3 or even 1/4 cup next time.  If you are going to make it with a less assertive dried fruit such as apricots or raisins then you may want to use the full 1/2 cup.  Also, I actually used more like 1.5 bananas in mine because that is what I had leftover from dinner, but it made the batter a little wetter than I liked, so if it looks too moist in the pictures, that is why.

– Stacey

Time for a treat – Black Bean Brownies

Child Eating Black Bean BrownieTime for a TREAT!  Black Bean Brownies!  Yay!
 
Wait, that sounds nasty to you?  Well, you have never had a black bean brownie then.  Because the chocolate flavor is so intense that you can’t even tell that all the flour in a regular brownie has been replaced by beans.  So, while these brownies are high fiber, lower carb, and even gluten-free, they are also rich, moist, and delicious.

The first time I saw a recipe for them was at All Recipes and then saw a different version at Meal Makeover Moms. I made several different versions of them and then tweeked it to get the recipe I give below.

I typically use semi-sweet chips, but this time I went with some white chocolate ones.  I also add a little prepared coffee (left over from breakfast) to bring out the chocolate flavor and add some flax seed just to give it some Omega-3s.  Both of those are optional.  Also, we like nuts in our brownies, so I put either chopped pecans or walnuts in, but again that is optional if you are not a nut lover or have someone with an allergy issue in your family.

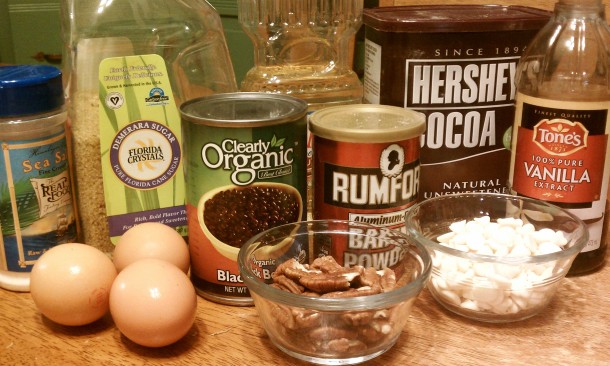
Black Bean Brownie Ingredients

Black Bean BrowniesBlack Bean Puree
(makes 16 2″x2″ brownies)

  • 1 15-oz can black beans, rinsed and drained very well
  • 3 eggs (organic is great and pastured is even better)
  • 3 Tbsp peanut or coconut oil (or whatever vegetable oil you prefer)
  • 1/3 cup unsweetened cocoa powder
  • 1 pinch of sea salt
  • 1.5 tsp aluminum-free baking powder (Rumford is one option)
  • 1 tsp real vanilla extract
  • 2/3 cup packed brown sugar OR 3/4 cup white granulated sugarBlack Bean Brownie Batter
  • 2 Tbsp prepared coffee (optional)
  • 2 Tbsp ground flax seed (optional)
  • 1/2 cup semi-sweet chocolate chips, divided
  • 1/2 cup pecans or walnuts, chopped (optional)

Preheat oven to 350 degrees.  Grease an 8” x 8” baking pan; I use my MISTO oil sprayer.  In a food processor, process black beans until smooth.  Add the eggs, oil, cocoa powder, salt, baking powder, vanilla extract, and sugar, and process until smooth.  Add half of the chocolate chips, and pulse a few times or stir, so that the chips are mixed in. Stir in chopped nuts, if using.  Transfer the batter to the baking pan, and sprinkle the remaining chips on top of the brownies.  Bake for 35-40 minutes, or until a toothpick inserted at the center comes out clean; check during the last 5 minutes so they don’t burn.  When cool, cut into squares.

Black Bean Brownie Batter in Pan

In Pan Before Baking

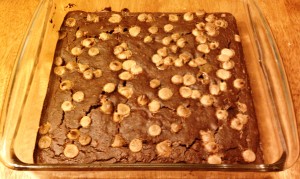
Baked Black Bean Brownies

In Pan After Baking

I ran the recipe through the Calorie Count Recipe Analyzer assuming the generous 2″x2″ square serving and these are the nutritional results below.  The downside is that it is high in sugar, but not really compared to other desserts.  On the upside, it is high in fiber and protein and low in sodium.

Plus, they are yummy and very chocolatey.  I have seen a recipe online for garbanzo-bean blondies, so we may be trying those soon.

– Stacey

black bean brownies nutrition

Black Bean Brownie Closeup

Crockpot Balsamic Chicken

Crockpot Balsamic ChickenLast week, I posted on my Facebook page that I tried this recipe from CrockPot Girls.  It is apparently pretty common on the web since I found the same recipe lots of other places and they admitted that someone had given it to them; they did not develop it.  So, I don’t really know who to “give credit” to for the basic recipe.  I changed a few things, so made it my own anyway.

What I like most about it is that it can be made in the crockpot, so you throw everything in and come back 3-6 hours later to find a meal ready.  But, there are lots of crock-pot recipes that are made with suspect foods such as “cream of… soup” so that is not enough for us to add it to our menu.  More importantly, this recipe uses real food such as chicken, tomatoes, onions, and vinegar.  It is your choice what to serve it with and we chose 100% whole wheat angel hair pasta.  But, brown rice or even whole wheat couscous would be good.

I was a little confused by the quantity of chicken specified in the original recipe as it said “4-6 boneless breasts”.  Sometimes, more so recently, people use “breast” to mean half of the chicken’s breast, sometimes called breast halves, or split breasts, meaning that each chicken has two of them.  But, I think traditionally, when recipes specified a “breast” they meant the entire breast, meaning a chicken only has one.  When I read this recipe, I thought the 4-6 breasts referred to split breasts.  I had a package with 9 split breast in it, so I had assumed I would be doubling everything.  But, that was way to much liquid for just the 9 split breasts, so I ended up not using as much of the tomatoes, etc.

The original recipe called for four different dried spices, but I have been using the Tone’s Italian Seasoning you can get at Sam’s Club which is a blend of oregano, thyme, basil, rosemary and sage and it has no salt or MSG in it.  So, unlike the original recipe, mine did have some sage in it.  The other thing I changed was adding the olives and capers.  I recommend the Lindsay “Naturals” olives, as they only have a few ingredients: olives, water, and sea salt.  The canned tomatoes I chose to use were the Muir Glen fire-roasted ones; they add something to any dish you make with them.  Last thing is that you can put the garlic cloves in whole after peeling if you want to, but I chose to smash mine.  Actually, that is the result of how I peel them.  🙂

Crockpot Balsamic Chicken Ingredients

Ingredients, not pictured are the olives and capers

Crockpot Balsamic Chicken
(make 8-16 servings depending on number of adults, kids, dieters, etc.)

  • 4 Tbsp olive oil
  • 8-10 boneless, skinless, split chicken breasts halves (about 3.5 lbs total of chicken)
  • ground black pepper and sea salt, to taste
  • 2 medium onions, thinly sliced
  • 2 Tbsp of salt-free “Italian seasonings” (or 2 tsp each: dried oregano,basil, and rosemary and 1 tsp dried thyme)
  • 6-8 garlic cloves
  • 3/4 cup balsamic vinegar
  • 2 14.5 oz cans diced or crushed tomatoes
  • 1/2 cup black or green pitted olives, drained and coarsely chopped
  • 2-3 Tbsp capers, drained

Pour the olive oil on bottom of  a 5-7 quart crock pot. Salt and pepper each chicken breast and then place the chicken breasts in crock pot. Put sliced onion on top of chicken. Then put in all the dried herbs and garlic cloves. Pour in vinegar and top with tomatoes, olives, and capers.  Cook on high for 3 hours or low for 4 – 6 hours. Serve over pasta or rice.

Balsamic Chicken Process

The kids all liked this and so did Mike.  We tried putting the leftovers in their lunchbox cold and it was not as big a hit, so it is better served hot.  If you are trying to eliminate/reduce grains, gluten, or carbs from your diet, you could serve it without the pasta or rice.  You just wouldn’t have anything to “sop up” the sauce, so you might want to serve it in a bowl.

– Stacey

UPDATED TO ADD: Just thought I would mention that I used an onion similar to a Vidalia in this dish and that combined with the balsamic vinegar gave it almost a sweet flavor.  This dish is not at all spicy and should appeal to most kids because of that.

The long awaited post on making Kombucha…

Finished Kombucha in Jar with SCOBY

Finished Kombucha in Jar with SCOBY

Kombucha!  Have you had it before or are you wondering what I am talking about?

Wikipedia states that: Kombucha is a tea-based beverage that is often drunk for its anecdotal health benefits or medicinal purposes. Kombucha is available commercially and can be made at home by fermenting tea using a visible, solid mass of yeast and bacteria which forms the kombucha culture, often referred to as the “mushroom” or the “mother”.

If you have ever bought kombucha, then you know that a 16 oz. bottle runs anywhere from $2 to $3.  So, the motivation for making it at home is purely financial for me.

It is a taste that some people love and some hate. I love it and so do the kids, but Mike hates it. Fine, more for us! If I had to describe its taste, I would say it is similar to hard apple cider.  It is effervescent, and since we don’t give the kids soda, it gives them a fizzy treat.  They do prefer the ones that I have flavored with a bit of grape juice to the plain stuff.  As a family, we drink about 1 gallon a week, but only because that is all I have been making.  We are doubling our production to 2 gallons a week soon.

I am not going to list the health benefits of kombucha here, but it does contain a lot of B Vitamins and is a good source of probiotics for folks that want to stay away from dairy sources such as yogurt.  Just google “kombucha + health” and you can spend days reading conflicting opinions on it.  By the way, here is a video from Barbara Allan about kombucha and probiotics. She and I went to college together 20+ years ago at The University of Alabama and both lived in the same dorm. Later, she battled arthritis and used diet to overcome that.

There are three phases to making your own homemade kombucha.  They are: growing the SCOBY (Symbiotic Culture of Bacteria and Yeast) also know as the mother or mushroom, brewing and fermenting the tea, and bottling and double or 2nd fermentation.

GROWING THE SCOBY

You get to skip this part if someone has given you a SCOBY.  I was not that lucky.  I made my SCOBY in an old well-washed glass peanut butter jar. I let it sit in the cabinet for about 3 weeks and it was about 1/2 inch thick by then. Here are a few pictures of a new one I am growing at 3 and 5 days old.  In the last picture, you can see the new daughter that will form on top of the mother in your fermenting jar once you start making the kombucha.

You will find detailed instructions on making your own kombucha SCOBY from a bottle of the store-bought stuff at Food Renegade and here is a video about doing it. I used those as my guide.

Basically, take a clean glass jar and pour in about 8 – 12 ounces or RAW UNFLAVORED storebought kombucha into it.  Put a clean breathable membrane over the top, such as cheese cloth, a kitchen towel or even a paper towel and hold it down with a rubber band.  Put the jar in an out of the way cabinet or pantry and leave it alone for 2-3 weeks.  It will grow faster when it is hotter such as in the summer and slower during the winter since it will be colder.

BREWING AND FERMENTING THE TEA

Once you have your SCOBY, to brew kombucha at home you need four ingredients: a large food-safe glass jar, clean water, sugar, and black and/or green tea.  Yes, I know, you don’t keep lots of white sugar around anymore, but this will be eaten by the SCOBY, not by you.  I have used both plain white sugar and “sugar in the raw” with success.  Do not use any kind of artificial sweetener (even stevia is a no-no) as the SCOBY actually needs something to eat.  Some people have used pasteurized (not raw) honey with limited success, but the closer it is to pure sugar, the better.

Black and green tea are the best options for the tea.  Red or rooiboos tea can be used for part of it, but not all.  The SCOBY has developed to process real tea, meaning leaves from the Camellia sinensis plant and that is what works best.  You also need to steer away from flavored teas as they can hurt your SCOBY.  For example, the bergamot oil in Earl Grey tea will damage your SCOBY.  Don’t worry, you can always flavor your kombucha after you have removed your SCOBY during the 2nd fermentation once it is bottled.  Also, organic is always a good choice for your tea.  Just because of what I have on-hand, I used organic green tea and conventional black tea.

Kombucha Tea Brewing Ingredients and Process

When making kombucha, it is important to not contaminate your brew.  So, you want to make sure everything is very clean.  But, traces of soap on your equipment is bad for the SCOBY, so wash everything well and make sure it is soap-free.  Also, make sure your hands and any spoons, funnels, etc. you are using are clean.

Boil about 1 gallon of water in a pot, I use my dutch oven.  When it is boiling, add 1 cup of sugar and let it dissolve.  Then turn off the heat and add your tea bags.  I used 2 family-size black tea bags and about 4 regular green tea bags.  Let it steep for at least 5-10 minutes and then remove the tea bags.  Let the tea cool to room temperature.  To prevent contamination, I cover mine with the dutch oven lid.

Once cool, pour the tea into your 1 gallon glass jar.  I bought one for about $5 that was billed as a “cracker jar“.  You do not need a lid so if you can find a used food-grade glass jar for free, great.  After you put the tea in, add your SCOBY and the kombucha liquid it has been growing in.  Each time you make kombucha, you will need to save about 1/2 to 1 cup of liquid from your last batch to add with the SCOBY.  This helps keep the environment acidic and prevents mold growth.

Put a piece of clean breathable membrane over the top of the jar, such as cheese cloth, part of a kitchen towel or even a paper towel and hold it down with a rubber band.  Put it in a dark place where it can sit undisturbed.  A cabinet or pantry is usually a good choice.  Wait anywhere from 5-10 days and you will have kombucha.  The kombucha ferments faster in the summer when warm and slower in the winter when cold.  Once you have enjoyed kombucha, you will recognize the slightly vinegary scent that lets you know it is ready.  Or, you can invest in pH test strips and test it, if you feel the need.

BOTTLING AND DOUBLE FERMENTATION

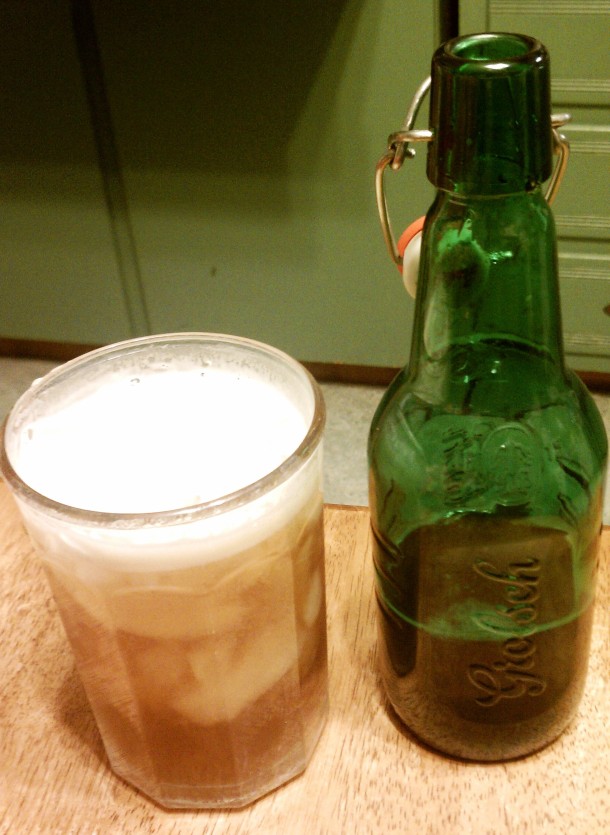
You can find a lot of information about double fermentation at Food Renegade’s blog.  You will want to get some glass bottles with tight-fitting lids.  You can use recycled kombucha bottles if you have them or you can get the bottles with a flip-top hinged cap, the kind that Grolsch beer often comes in.  You can buy those at a beer brewing supply store or just do what we did and buy Grolsch beer and save the bottles.

The first step in bottling is taking care of your SCOBY.  With clean hands, gently lift it out and put is on a clean plate or bowl.  Save the 1/2 to 1 cup of kombucha that it will need.  Set that aside.

The rest of your kombucha can now be bottled. For plain or original kombucha, all you do is pour the kombucha into a clean bottle (I filter mine with a small plastic sieve) and close the bottle.  For flavored kombucha, you can add whatever you like at this point.  Just look around the Internet or check out the ingredients of storebought kombucha for ideas.  We typically add juice and/or ginger to ours.  If you want to add juice, put 1 oz. of juice into your clean bottle and then add 14-15 oz. of kombucha on top and close the bottle.

Place the closed bottles in a warm dark place for 2-5 days and then refrigerate until ready to enjoy.  The ones with juice (AKA sugar water) added will get fizzy faster.  So, I would give the plain or ginger ones longer then the juice ones.  Always be careful when you open a bottle of kombucha as they are pressurized.  Open it very carefully and enjoy.

Kombucha Bottling Process

You say “but you are talking about fermentation, so isn’t kombucha alcoholic?”  Well, it can be, but not under the conditions I have given here.  If you add a lot of something sugary, such as juice to the kombucha before the 2nd fermentation and then allow it to ferment at room temperature for a long time, yes you will create some alcohol.  But, normally kombucha contains less than 0.5% alcohol, which classifies kombucha as a non-alcoholic beverage.  Typically, our 2nd ferment is only a couple of days, just enough to get a little fizz, so it is not a problem.
– Stacey
Serving Kombucha
NOTE: I am not an expert on the preparation of fermented items containing bacteria.  I have just learned to make kombucha by reading about it and experimenting.  Please only use my instructions as a guide.  If you do something wrong and get sick, I am not responsible.  You probably won’t, but I am just saying.  The biggest concern is not being clean enough and getting some contamination.  If you look on the web, you can find lots of pictures of what a healthy SCOBY looks like and what a moldy one does. If you are worried, just keep paying $3 a bottle for kombucha at the store.

Espinacas con Garbanzos (Spinach and Chickpeas) – a Spanish dish

Spinach and Garbanzos in BowlI heard about this dish on the Smitten Kitchen blog  and had to try it.  The veggies make it high in both Vitamin A and C and the garbanzos provide both protein and fiber.  What more could you want?

It is delicious and also works for vegetarians as a main dish.   Or, omnivores can serve it as a side to a grilled meat. Apparently, it is normally served in Spain, especially Seville, with small pieces of toast as a tapas dish. 

Of course I made a few changes to the original recipe.  🙂   Feel free to adjust the spinach to garbanzo ratio to suit you and your family’s taste.

Espinacas con Garbanzos (Spinach and Chickpeas)
Adapted from Smitten Kitchen
(Serve 4 as a main or 8 as a side)

  • 6 tablespoon olive oil
  • 1/4 cup chopped onion
  • 3 garlic cloves, finely chopped
  • 1 pound raw spinach, washed
  • 1/2 pound dried chickpeas, cooked until soft and tender or two 15-oz cans of chickpeas, rinsed and drained
  • 1/2 cup tomato sauce
  • 1/2 teaspoon ground cumin
  • 1 1/2 tablespoon red wine vinegar
  • 1 pinch red pepper flakes or a few shakes of tabasco
  • 1/2 teaspoon smoked paprika (add more if you like, it is tasty without being “hot”)
  • sea salt and freshly ground black pepper, to taste
  • lemon juice, to taste

Spinach and Garbanzos on Plate

  1. Place a large saucepan over medium heat and add the olive oil.  When hot, add the onion and cook a few minutes.
  2. Add the garlic, cook 1 minute, then add the spinach with a pinch of salt and stir well.  Cook until the spinach is wilted and soft.
  3. Add the chickpeas, tomato sauce, spices and all remaining ingredients. Stir until the chickpeas have absorbed the flavors and are hot.
  4. Check for seasoning and serve on fried bread toasts as the Spanish do.

Note about the Smoked Paprika:  You really need to try this stuff as it adds so much flavor.  I found mine at one of the local natural food stores that sells bulk spices.  I understand you can also order it from Penzeys, but apparently, even McCormick has a version.  I have read that they smoke the peppers first  and then dry and grind them.  You might be able to get by with substituting regular paprika and some liquid smoke, but do try to find the smoked paprika if you can.

– Stacey

Laundry tip for messy cooks like me…

I am a bit of a messy cook and since I rarely wear an apron, quite often I find grease and other stains on my clothes after cooking.  These were always annoying, especially since they were often still there after washing the clothes.

Recently, I came across a hint that works to get those stains out, even if you don’t find them until after the garment has already been washed and dried once.  Just put a bit of regular liquid dishwashing soap (the kind for the sink, not the dishwasher) on the stain, allow to sit for at least 5-10 minutes and then wash as usual…no more grease stain.

I had seen this tip saying to use Dawn dish soap, but I have been using Seventh Generation and that works fine as well, so probably any brand would work.  I have read (but not tried) that you can even use shampoo.  Dish soap is designed to “cut grease” and it works even on your clothes.

– Stacey

Fun Food – Green Eggs – No icky food dye needed

Quick post today.  I was going back through the pictures on my cellphone and found this one:

Green Eggs

Last year in kindergarten for some day related to Dr. Seuss, perhaps his birthday, their teacher made green eggs for all the kids using green food coloring.  The girls were quite taken by this, but we try to avoid food coloring.

Per Marion Nestle:
“Food dyes have only one purpose: to sell junk foods.  Candy, Cheetos, and sodas that are brightly colored are perceived as tasting better than the grey alternatives.  The food industry needs food dyes badly. But nobody else does.  Parents of hyperactive kids can easily do their own experiment and see if removing food colors helps calm their kids down. Food dyes have no health benefits that I can think of.  Kids don’t need to be eating those foods anyway.  Kids will not be harmed by avoiding food dyes. It would be nice to have more conclusive research.  In the meantime, read food labels! .”

Now, if you are using pastured or at least good quality organic eggs, then they will already have yolks that are naturally a bright yellow or orange color, so your scrambled eggs will already have a nice color.  But, if you want to make “green eggs” for your Dr. Seuss fans, here is a way to make them without having to use the dye.

Green Eggs
(serves 4 children or 2 fun adults)

  • 4 organic eggs
  • 1 “handful” of raw spinach
  • salt and pepper, to taste

Crack eggs into your blender. Add raw spinach. Add salt and pepper.  Put on the lid and run blender until the spinach is totally pureed into the eggs.  Scramble eggs however you normally do it.  We used a bit of real butter in ours and do not like them gooey. Enjoy your GREEN EGGS.

You do not taste the spinach in the eggs at all.   As a plus, running the eggs through the blender makes them really fluffy.  For even more “fun”, chop up and add some nitrate-free ham to the eggs as they cook.  Then you can give the kids “Green Eggs and Ham”.

– Stacey

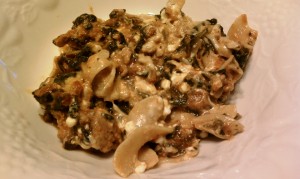
Lazy Mom’s Lasagna

I like Lasagna and so does the family, but I hate taking the time to make lasagna with the big long noodles that tend to rip to shreds while I am layering them.  Also, they are hard to cut and even harder for kids to eat.    Yes, I know they make noodles that you can put in without cooking them first, but this recipe is just so much easier. 

A friend reminded me while we chatted during the girls’ gymnastics class this week of the “Lazy Lasagna” recipe because she was making something similar for dinner that night.  Her version was vegetarian since it didn’t include the turkey or beef, but our family likes the one with the meat.  I made a few changes to the basic recipe and this is the result.  The girls literally LOVED it and I had to cut them off in order to have enough for me to take for lunch the next day.  🙂

We like this recipe because it uses broad egg noodles instead of lasagna noodles.  Yes, you can find those in whole wheat.  For the spaghetti sauce, I used the Ragu “no sugar added” tomato & basil version.  If you make your own sauce, even better.  I used cottage cheese instead of the typical ricotta because the storebought Daisy cottage cheese  only had three ingredients: cultured skim milk, cream, and salt, while the ricottas had things like guar gum, carrageenan, and xanthan gum in them.  There are brands of ricotta that just have real food ingredients, but apparently they are not sold at my local grocery store.

Lazy Mom’s Lasagna

  • 1 lb. ground turkey or lean beef, browned
  • 2.5 c. spaghetti sauce (that is usually the size of 1 jar)
  • 10 oz. of frozen chopped spinach
  • 2 c. cottage cheese
  • 2 c. shredded mozzarella cheese
  • 3/4 c. Parmesan cheese
  • 8 oz. of whole wheat or whole grain broad egg noodles
  • 1 egg
  1. Cook the noodles according the package direction.  While they are cooking, brown the ground turkey, then add the sauce and frozen spinach and heat until the spinach is cooked through.
  2. In large mixing bowl, mix cottage cheese, 1.5 cups mozzarella, Parmesan and the egg.  Drain the noodles and add to mixing bowl with cheeses. Mix well.
  3. Cover bottom of lasagna pan with thin layer of meat sauce. Layer half of noodle-cheese mixture in pan, then layer of sauce, last of the noodle mixture and more sauce.
  4. Top with remaining 1/2 cup of mozzarella and bake uncovered in a preheated 350 degree F oven for 30 – 40 minutes.

The only downside to this recipe is that it is high in sodium thanks to the jarred spaghetti sauce and the cheese.  If you can find a lower sodium sauce or make your own, that is all the better.  On a positive note, it has lots of Vitamin A, Iron and Calcium.

– Stacey